Aklipi3D

Home/Scale & Cut Studio

Scale & Cut Studio icon Windows · Free · v2.0.3

Print models bigger than your printer

Scale & Cut Studio takes a Bambu Studio project, scales it up, cuts the oversized objects into plate-sized pieces with alignment connectors and color-matched seams, orients and packs them onto plates, and writes a new .3mf that’s ready to slice.

  • Single .exe, nothing to install
  • Never overwrites your files
  • Free, no account
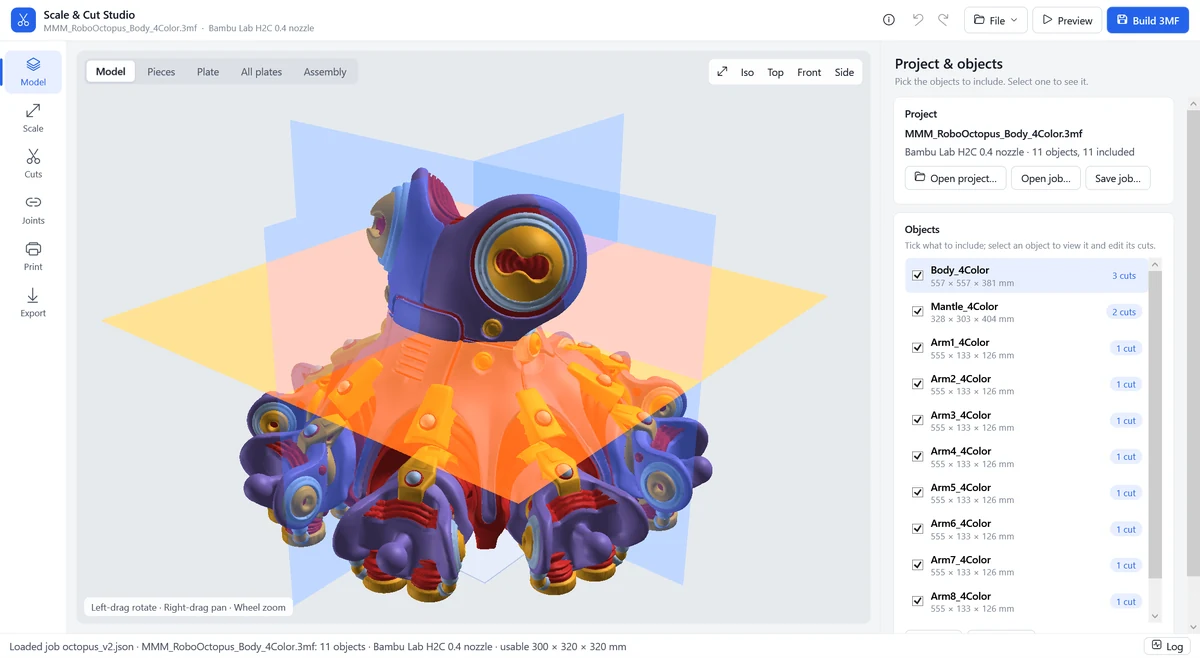
Scale & Cut Studio showing a multi-color robot octopus model with cut planes and a list of 11 objects, each marked with how many cuts it needs
An 11-object project on a Bambu Lab H2C — cut planes in the 3D view, the printer and its 300 × 320 × 320 mm plate read straight from the project, and every object measured and labeled with the number of cuts it needs.
Screenshots

Every step, from open to export

Click any shot to enlarge it. These are from a real job: a four-color robot octopus scaled to 557 mm, which came out as 28 pieces on 15 plates with 19 glue joints.

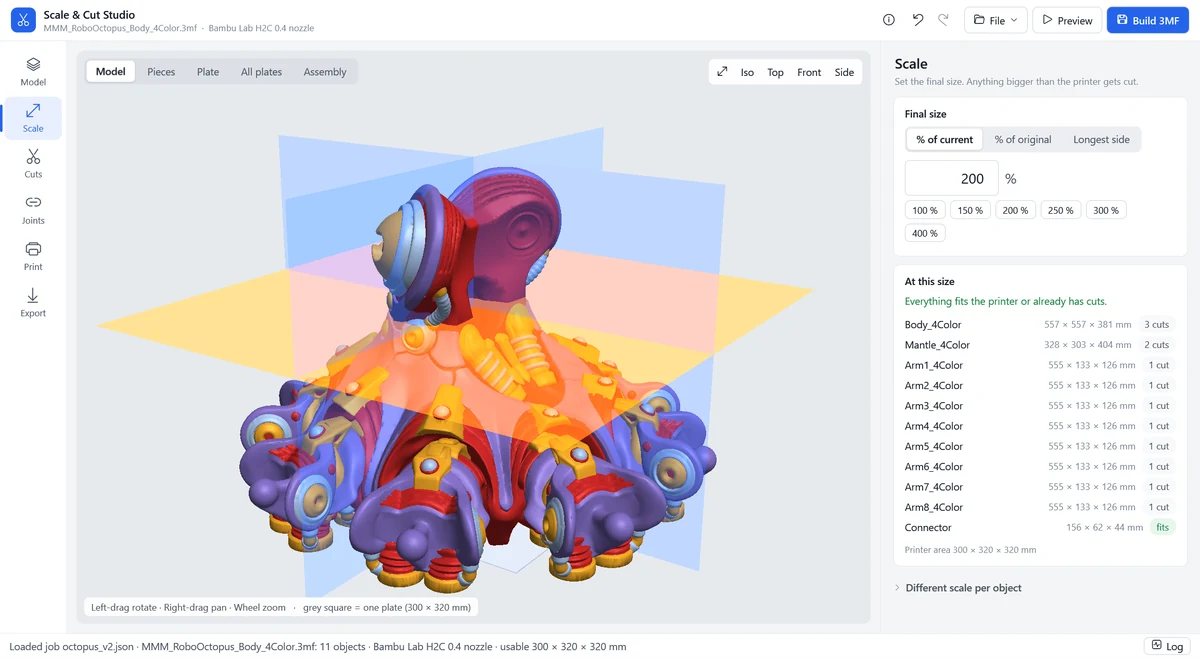
Scale panel with percentage and target-size options and quick buttons from 100 to 400 percent
ScalePercentage of current size, percentage of the original model, or the longest side in millimeters — with per-object overrides.
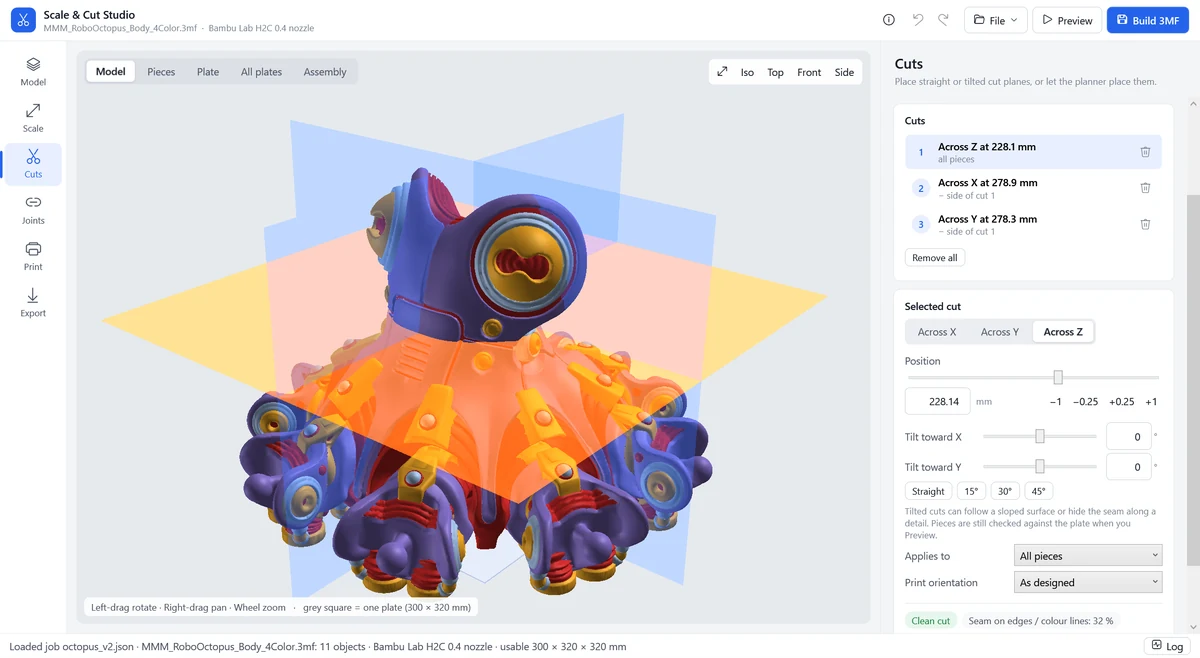
Cuts panel listing three cut planes with position slider, tilt controls and a clean cut tag
CutsThree planes on this object. The selected cut can be nudged in 0.25 mm steps; the tag below reports a clean cut and how much of the seam lands on an edge or color line.
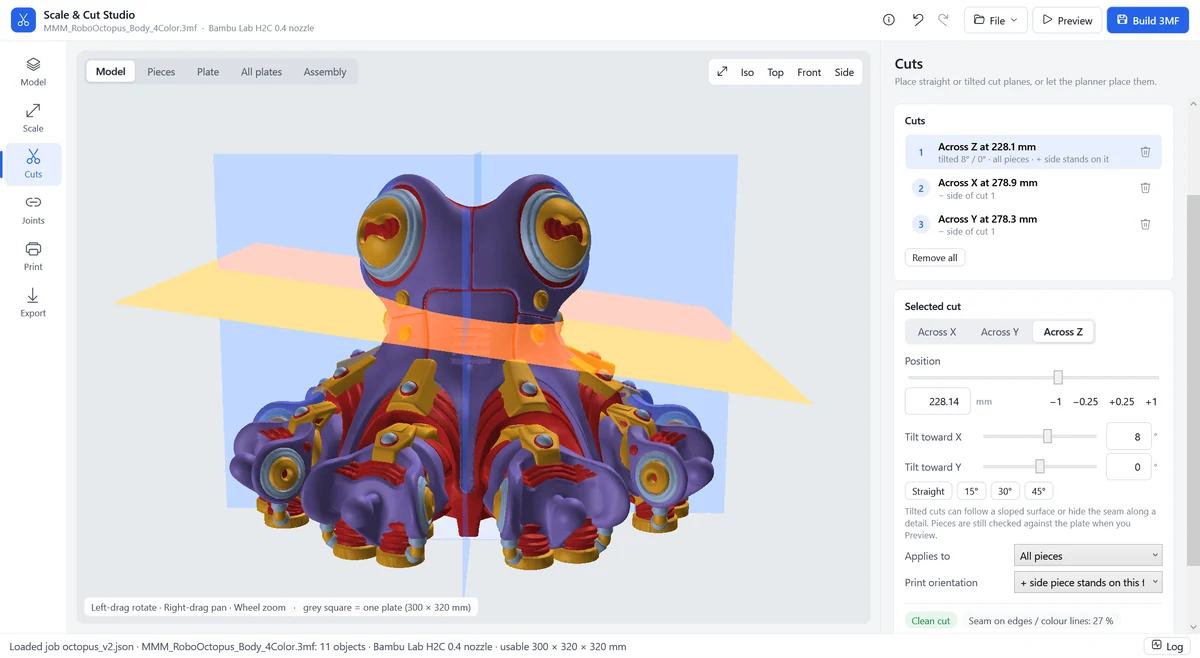
The same cut tilted eight degrees toward X, with the piece set to stand on the cut face
Tilted cutsAn 8° tilt follows the sloped surface and hides the seam along a detail. The piece is set to stand on that face so the slicer will accept it.
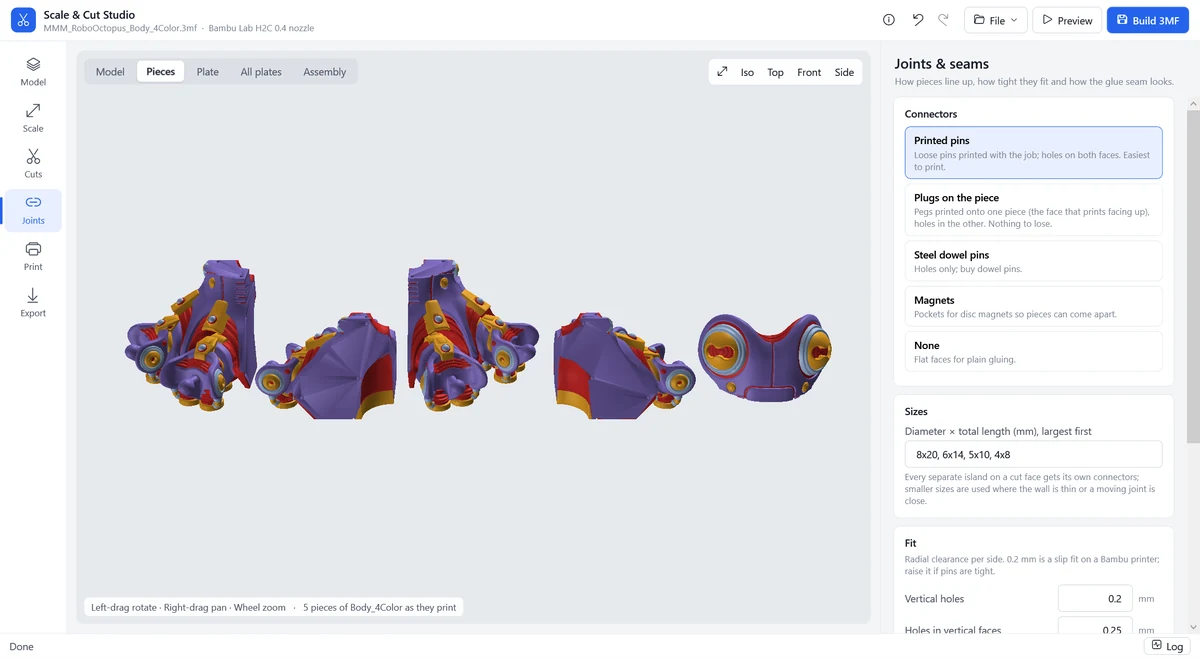
Pieces view showing five separated pieces beside the connector options: printed pins, plugs, steel dowels, magnets or none
Joints & seamsFive pieces as they will print, next to the five connector styles. Every separate island on a cut face gets its own pins, sized down where a wall is thin.
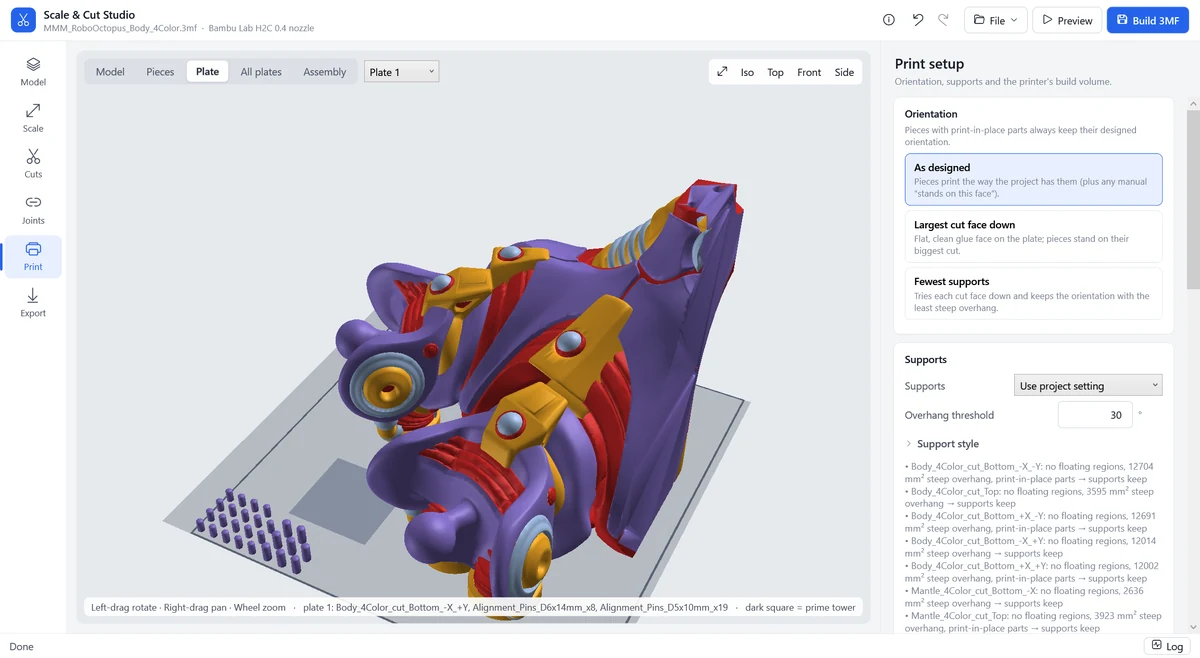
Single plate view with orientation choices and a per-piece support report
Print setupOne plate with its alignment pins in the corner, the three orientation modes, and a per-piece report of steep overhang and print-in-place parts.
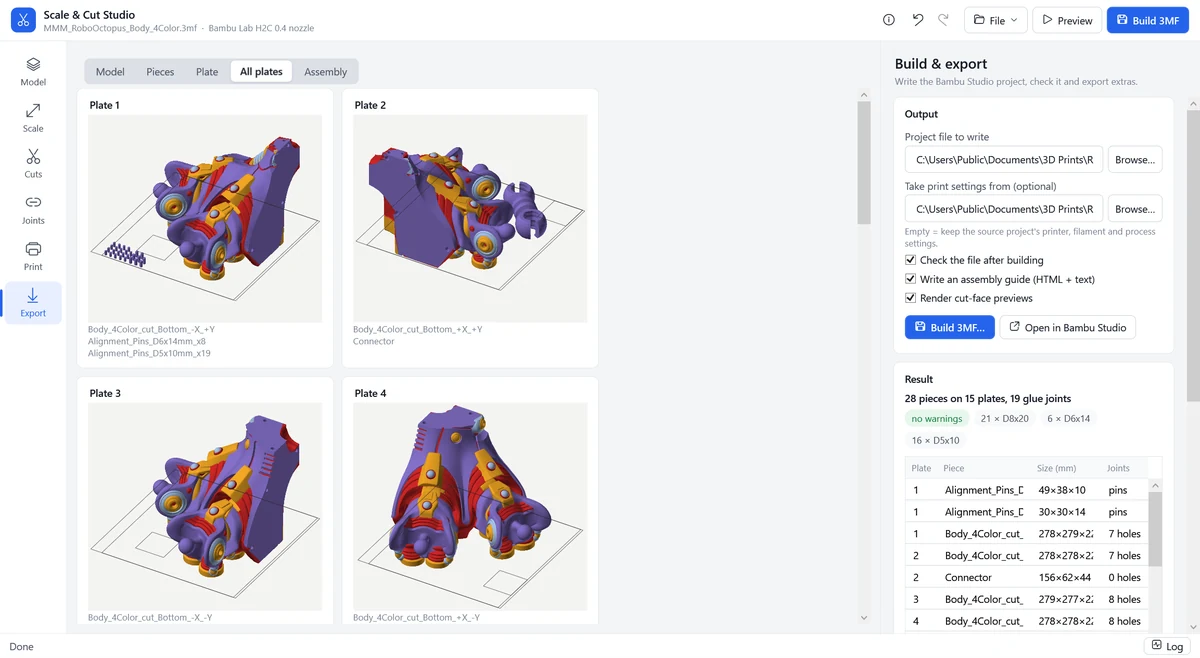
All plates view with a build and export panel reporting 28 pieces on 15 plates and 19 glue joints with no warnings
Build & exportAll plates at once, and the result: 28 pieces, 15 plates, 19 glue joints, no warnings, with the pin sizes tallied and a table of every piece.
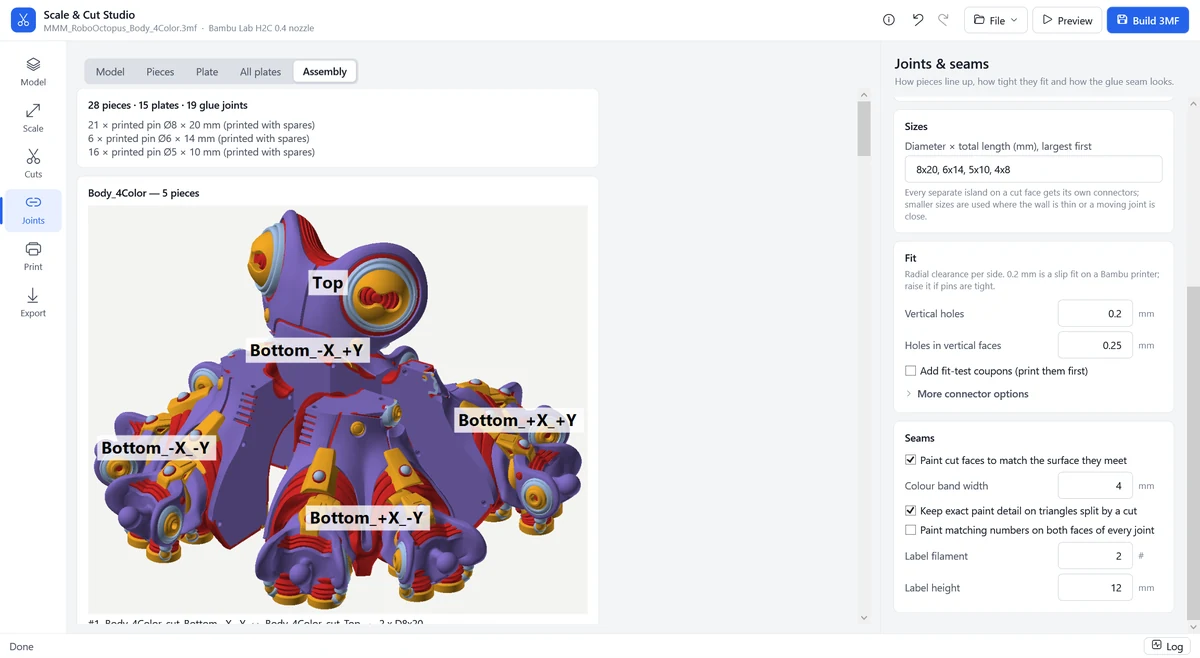
Assembly view with each piece labeled by name and a list of the printed pins needed
Assembly guideWhich piece is which, joint by joint, with spare pins counted in. Written out as HTML and plain text next to the .3mf.
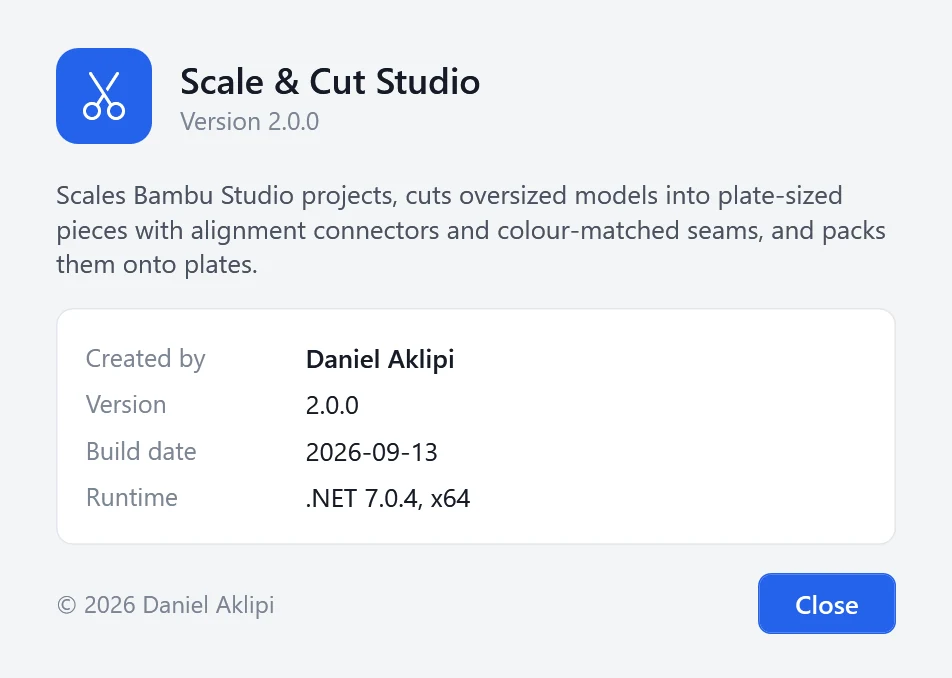
About dialog showing Scale and Cut Studio version 2.0.0, built 2026-09-13 on .NET 7.0.4 x64
AboutVersion, build date, runtime and author. This screenshot is from version 2.0.0.
6Guided steps
5Connector types
3Cut axes, straight or tilted
0Installers to run
Why it exists

Your plate is 320 mm. The model is 557 mm.

Scaling a model up past your build volume is the easy part — what takes the evening is cutting it sensibly, keeping print-in-place joints intact, adding pins that actually line up, hiding the glue seams, and then re-plating two dozen pieces by hand. Scale & Cut Studio does that pass for you and hands back a project you can slice.

What it does

Six steps, one new project file

Each step has its own panel, with the values you rarely touch folded away. Undo and redo cover the lot, and a job file saves every setting and every cut for later.

ScaleStep 2

Scale it however you think

By percentage of the current size, percentage of the original model, or a target length for the longest side in millimeters. Quick buttons jump 100–400 %, and a single object can take a different scale from the rest.

Auto-planStep 3

Cuts placed for you

Auto-plan sizes every piece to the plate, steps around print-in-place joints, avoids thin slivers, and puts the seams on edges and color changes where it can find them.

CutsStep 3

Or place them yourself

Cuts across X, Y or Z, slid to the millimeter and tilted in two directions. Limit one to a single side of an earlier cut, or let a piece stand on its cut face. Tags call out clean cuts, moving joints, thin parts and slivers as you go.

JointsStep 4

Pins, plugs, dowels or magnets

Five ways to line the pieces up: pins printed loose with the job, plugs printed onto one piece, holes for store-bought steel dowels, pockets for disc magnets, or plain flat faces. Set the fit clearance and print fit-test coupons before you commit to the whole job.

PrintStep 5

Oriented and plated

Print pieces as designed, largest cut face down, or whichever way needs the fewest supports. Supports, brim, infill and walls for everything or per object, with the printer and its build volume read out of the project.

ExportStep 6

A project, a guide and a check

Preview the plates before anything is written, then build a new .3mf alongside an assembly guide in HTML and plain text. Export one STL per piece, have Bambu Studio slice every plate and report time, filament and cost, or open the result straight in the slicer.

The workflow

Open a .3mf, work down the rail

The six steps live on a rail down the left of the window. The 3D view in the middle switches between the model and its cut planes, the pieces as they print, one plate, all plates, and the finished assembly.

  1. 1

    Model

    Open the project or drop it on the window. Check the objects to include — each one shows its size and whether it fits or needs cutting.

  2. 2

    Scale

    Pick a percentage or a target size in millimeters, for everything at once or object by object.

  3. 3

    Cuts

    Let the planner place them, or add your own across X, Y and Z and tilt them. Tags warn about moving joints, thin walls and slivers.

  4. 4

    Joints & seams

    Choose the connectors and their fit, and paint the cut faces to match the surface they meet so the glue line disappears.

  5. 5

    Print setup

    Orientation, supports, brim, infill, walls, plate gap and prime-tower room — or just keep what the project already had.

  6. 6

    Build & export

    Preview, then write the .3mf and its assembly guide. Optionally export STLs, slice-check every plate, and open it in Bambu Studio.

Download

Free for Windows

One zip, two files inside: the app and its manual. Unzip it anywhere and double-click.

Scale & Cut Studio 2.0.3

Windows 10 / 11, 64-bit 67 MB .zip Free
Download for Windows
Version
2.0.3
File
ScaleCutStudio_2.0.3_win-x64.zip
Build date
September 26, 2026
Runtime
.NET 10.0.12 (x64) — bundled, nothing to install
Author
Daniel Aklipi
SHA-256
8a748ed953bb065835d5b7187c27222806ef4fe73a17a2fdf5d2bc0c90812e00

The app isn’t code-signed, so Windows SmartScreen will warn you about an unknown publisher the first time. Click More info → Run anyway, or check the SHA-256 above against your download first.

Prefer to read the manual before downloading 67 MB? Open the README.

Before you start

  • Nothing to install — everything the app needs is inside the one .exe.
  • Your own files are never overwritten; the app always writes a new .3mf.
  • Bambu Studio is only needed for Slice check and Open in Bambu Studio. Everything else works without it.
  • Always Preview and look at the plates before building — the auto-planner and the orientation modes are good guesses, not guarantees.
  • 0.2 mm clearance per side is a slip fit on a Bambu printer. Print the fit-test coupons first if you want to be sure.

Not supported yet: dovetail and snap-fit joints, zig-zag cut profiles, and hollowing — the slicer’s infill already keeps big pieces light.

Found a bug or want a feature? Mail daniel@aklipi.com.

Scale & Cut Studio is an independent tool by Daniel Aklipi. It reads and writes Bambu Studio project files but is not affiliated with, endorsed by, or supported by Bambu Lab.

FAQ

Printing bigger than your printer: common questions

How do I 3D print a model that is bigger than my printer’s build plate?

Cut it into pieces that fit, add alignment connectors, print the pieces and glue them together. Scale & Cut Studio does the cutting for you: open a Bambu Studio .3mf, choose the new size, and it places the cuts, adds pins, orients the pieces, packs them onto plates and writes a new project that is ready to slice.

Is Scale & Cut Studio free?

Yes. It is free to download and use, with no account and no installer.

Does it work with printers and slicers other than Bambu?

It opens and writes Bambu Studio .3mf projects and reads the printer and build volume from the project. It can also export one STL per piece, without color, which any slicer can load.

Do I need Bambu Studio installed?

Only for Slice check and Open in Bambu Studio. Scaling, cutting, connectors, plating and building the new .3mf all work without it.

What kinds of connectors can it add between pieces?

Loose printed pins, plugs printed onto one piece, holes for steel dowel pins, pockets for disc magnets, or plain flat faces. You set the fit clearance and can print small fit-test coupons first. 0.2 mm per side is a slip fit on a Bambu printer.

Does it run on Mac or Linux?

Not yet. It needs 64-bit Windows 10 or 11.

Why does Windows SmartScreen warn about the download?

The app is not code-signed, so Windows shows an unknown-publisher warning the first time. Click More info, then Run anyway, or first compare the file’s SHA-256 with the one published above.

Will it overwrite my original project?

No. Your files are never overwritten; the app always writes a new .3mf alongside an assembly guide.


Don’t want to print it yourself? Send us the model and we’ll scale, cut, print and ship it.